如期而至的SVN服务器迁移引来一个大瓜XAMPP

前言

之前对于版本控制工具 svngit 更多的是操作命令的使用,而最近逐步开始接触使用环境的搭建了,对于一些私有项目还是需要在内部服务器上搭建一个 svn 或者 git 服务器的,前段时间因为 SVN 服务器硬盘空间告急,所以 SVN 数据迁移被提上了日程,经过几个月的准备,终于要动手了,期间也讨论了几个方案,结果最终迁移完发现,和我想的完全不一样啊,看来还是我太年轻了,世界真大~

方案评估

进行重大行动前总要有个可行性分析,虽然这不算特别重大,但终归会影响一个项目组的工作,所以要尽可能考虑周全,避免造成数据损失,影响开发进度,所以一开始基于目前数据仓库的现状提出了几种迁移的方案:

  1. 原机器增加硬盘:经运维同学确认机器太老,不支持扩展了,此路不通

  2. 采用 svnadmin dump 这种官方推荐的备份方式:这种方式采用 svnadmin dumpsvndumpfiltersvnadmin load 等命令可以实现仓库备份、还原、甚至定向过滤等目的,但这种方式适合数据少短历史的仓库,如果版本比较大,如版本数增长数十万,那么dump的过程将非常慢,恢复过程更耗时,另外还有一个难点,这种方式要求磁盘空间足够,但是目前仓库占用90%,剩余的10%用来备份绝对不够的,所以此种方法也基本行不通

  3. 丢弃提交历史,本地客户端更新最新数据,然后提交到新配的服务器上,做0版提交:此种方法可以绕过磁盘不足的问题,但这种方式丢掉了历史记录,并且改变了仓库的uuid,测试时发现无论是 switch 还是 relocate 命令都无法直接切换,基本上要重新下载一份数据了。

  4. 把整个系统连同数据直接镜像到新配置的服务器上:这种方式可以保留完整的提交记录,同时不需要老硬盘提供太大的空间,但操作难度上还需运维同学评估。

  5. 其他:使用 svnadmin hotcopy 进行全量拷贝,备份过程较快,灾难恢复也很快;使用 svnsync 制作2个镜像库,须在 svn1.4 版本以上使用。这些基本都是备份的方式,是保证数据安全应该采取的策略,可以作为参考。

所以综上优先选择全盘镜像,其次选择用最新的数据做0版的方式,除此之外如果用 svnadmin 因硬盘受限就只能划分成一个个子目录来迁移了。

前奏

之前我接触到的svn服务器基本就是安装svnserve就好,修改用户的访问权限可以直接在服务器上编辑access配置文件,后来了解到了 svnmanager 才知道原来有个可以修改这些配置文件的网页啊,用起来方便了许多,这次迁移之前我还是停留在这个层面上,结果运维同学搭建好环境后,我用 ps 命令找了半天也没找到 svnserve 进程,然后在历史记录里发现了 xampp 这货

接着便查找了很多关于 xampp 的知识,才发现之前还是弱了,这些基本都没了解过,经过这一次迁移,接触到了几十个命令、相关工具和配置文件,特此记录一下整个过程,方便今后复习和拿来就用。

最终迁移的方案选择的是数据整体拷贝,通过网络从旧机器发送到新机器上,然后在新机器上搭建svn服务器环境,这种方式好处很多:不依赖原机器剩余的硬盘空间、传输方便、可以完整保留历史记录、不用重新配置权限文件、修改域名绑定后对所有使用者几乎无感,即使需要重新认证,输入自己的svn用户名密码就搞定了,非常方便。

svn客户端访问服务端时可以通过svnserve、svnserver+ssh、Apache等多种方式访问。svnserve是一个小巧、轻便的服务器程序,设置简单,可以使用 subversion 专有的协议进行访问;但因为本身不提供加密通讯的功能,安全性低,可以通过ssh建立在安全隧道后调用svnserve程序;当然也可以通过http访问,利用Apache通过mod_dav_svn访问版本库,进而进行svn的操作。

我平时用的较多的也是通过 http 协议来访问和更新 svn 仓库的,可以直接搭建 Apache 来实现,也可以使用很方便的 xammp 来实现,本质上访问svn数据和使用svnmanager管理用户和权限都是网页服务,所以这两项都可以利用xammp,那么接下来简单了解下什么是 xammp

XAMMP

XAMPP(Apache+MariaDB+PHP+PERL)是一个功能强大的建站集成软件包。这个软件包原来的名字是 LAMPP(Linux+Apache+MySQL+PHP+PERL),但是为了避免误解,最新的几个版本就改名为 XAMPP 了。

XAMMP 的出现源于人们对安装网页服务时的挫败感,许多人通过他们自己的经验认识到安装 Apache 服务器是件不容易的事儿,如果您想添加 MySQL、PHP 和 Perl等环境那就更困难了。XAMPP 是一个易于安装且包含 MySQL、PHP 和 Perl 的 Apache 发行版,非常容易安装和使用:只需下载,解压缩,启动即可,最近的版本把解压缩这一步替换成了运行脚本安装,其实和解压缩一样。

因为软件包非常全,一下就解决了访问、数据存储、数据管理、插件安装管理等多个方面,我查看了其中一些软件的配置文件,比如MySQL,无论是配置路径还是数据存储路径都是在 XAMPP 安装路径下,如果想在新的机器上部署一套完全一样的服务,只需要拷贝整个安装目录到新机器上就行了(前提是一些安装时创建的新用户要有),保险的做法是在新机器上安装一次,再用旧机器数据覆盖上去就行了。

前面夸了 XAMPP 这么久,那么它有没有缺点呢?当然有!缺点就是不安全,XAMPP仅用于开发目的,它具有某些配置设置(比如MySQL没有密码),使本地开发变得容易,如果你想让你搭建的XAMPP可以从互联网访问,这样并不是一个好的做法,可以使用WAMP, MAMP或LAMP等替换方案,这些是类似的软件包,更适合生产环境。

不知道是不是因为仅用于开发环境,网络上很难找到在Linux 环境下安装 XAMPP + subversion + svnmanager 的完整教程,在 windows 下安装倒是有几篇,所以我追随运维同学使用历史命令列表,尝试完整搭建一次 svn 服务,这可是从几百个命令列表中不断尝试出来的。

搭建svn服务

系统环境如下:

[root@VM-0-3-centos /]# hostnamectl
Static hostname: VM-0-3-centos
Icon name: computer-vm
Chassis: vm
Machine ID: 5467bde017714ffcad6d449b4a1fbbbc
Boot ID: 8aa2f3bd14104190bc11e39bf2831052
Virtualization: kvm
Operating System: CentOS Linux 7 (Core)
CPE OS Name: cpe:/o:centos:centos:7
Kernel: Linux 3.10.0-1127.19.1.el7.x86_64
Architecture: x86-64

准备软件包

可以自行去官网下载:

  • xampp-linux-x64-5.6.40-1-installer.run
  • subversion-1.10.8-bin.tar.gz
  • svnmanager-1.10.tar.gz

安装必要环境和工具

1
2
3
yum install -y epel-release
yum install vim net-tools telnet wget bind-utils ipmitool ntp rsync
yum install libserf

安装xampp

给脚本添加可执行命令后,直接运行即可:

1
2
chmod +x xampp-linux-x64-5.6.40-1-installer.run
./xampp-linux-x64-5.6.40-1-installer.run

安装过程还真是挺容易的,一直输入 Y 就可以了

1
2
3
4
5
6
7
8
9
10
11
12
13
14
15
16
17
18
19
20
21
22
23
24
25
26
27
28
29
30
31
32
33
34
[root@VM-0-3-centos software]# ./xampp-linux-x64-5.6.40-1-installer.run
----------------------------------------------------------------------------
Welcome to the XAMPP Setup Wizard.

----------------------------------------------------------------------------
Select the components you want to install; clear the components you do not want
to install. Click Next when you are ready to continue.

XAMPP Core Files : Y (Cannot be edited)

XAMPP Developer Files [Y/n] :Y

Is the selection above correct? [Y/n]: Y

----------------------------------------------------------------------------
Installation Directory

XAMPP will be installed to /opt/lampp
Press [Enter] to continue:

----------------------------------------------------------------------------
Setup is now ready to begin installing XAMPP on your computer.

Do you want to continue? [Y/n]: Y

----------------------------------------------------------------------------
Please wait while Setup installs XAMPP on your computer.

Installing
0% ______________ 50% ______________ 100%
#########################################

----------------------------------------------------------------------------
Setup has finished installing XAMPP on your computer.

运行xampp

进入到目录下启动服务

1
2
cd /opt/lampp
./xampp start

报下面的错误:

1
2
3
4
5
6
7
8
9
10
11
12
13
14
15
16
17
18
19
20
21
22
23
24
25
26
27
28
29
# ./xampp start
/bin/sh: error while loading shared libraries: libdl.so.2: cannot open shared object file: No such file or directory
/bin/bash: error while loading shared libraries: libdl.so.2: cannot open shared object file: No such file or directory
/bin/sh: error while loading shared libraries: libdl.so.2: cannot open shared object file: No such file or directory
/opt/lampp/bin/gettext: error while loading shared libraries: libc.so.6: cannot open shared object file: No such file or directory

id: error while loading shared libraries: libc.so.6: cannot open shared object file: No such file or directory
/opt/lampp/share/xampp/xampplib: line 11: test: -ne: unary operator expected
/opt/lampp/bin/gettext: error while loading shared libraries: libc.so.6: cannot open shared object file: No such file or directory
XAMPP: netstat: error while loading shared libraries: libc.so.6: cannot open shared object file: No such file or directory
/bin/sh: error while loading shared libraries: libdl.so.2: cannot open shared object file: No such file or directory
netstat: error while loading shared libraries: libc.so.6: cannot open shared object file: No such file or directory
/opt/lampp/bin/gettext: error while loading shared libraries: libc.so.6: cannot open shared object file: No such file or directory
/opt/lampp/bin/httpd: error while loading shared libraries: librt.so.1: cannot open shared object file: No such file or directory
/opt/lampp/bin/gettext: error while loading shared libraries: libc.so.6: cannot open shared object file: No such file or directory
XAMPP: hostname: error while loading shared libraries: libnsl.so.1: cannot open shared object file: No such file or directory
netstat: error while loading shared libraries: libc.so.6: cannot open shared object file: No such file or directory
/bin/sh: error while loading shared libraries: libdl.so.2: cannot open shared object file: No such file or directory
/opt/lampp/bin/gettext: error while loading shared libraries: libc.so.6: cannot open shared object file: No such file or directory
XAMPP: netstat: error while loading shared libraries: libc.so.6: cannot open shared object file: No such file or directory
/bin/sh: error while loading shared libraries: libdl.so.2: cannot open shared object file: No such file or directory
/opt/lampp/bin/gettext: error while loading shared libraries: libc.so.6: cannot open shared object file: No such file or directory

cat: error while loading shared libraries: libc.so.6: cannot open shared object file: No such file or directory

编辑xampp

1
vim xammp

将文件中 export LD_ASSUME_KERNEL=2.2.5 内容改成 export LD_ASSUME_KERNEL=2.8.0,再次启动时正常

1
2
3
4
5
[root@VM-0-3-centos lampp]# ./xampp start
Starting XAMPP for Linux 5.6.40-1...
XAMPP: Starting Apache...ok.
XAMPP: Starting MySQL...ok.
XAMPP: Starting ProFTPD...ok.

访问xampp

浏览器输入IP后回车,显示页面如下,XAMPP 就安装好了,是不是很方便
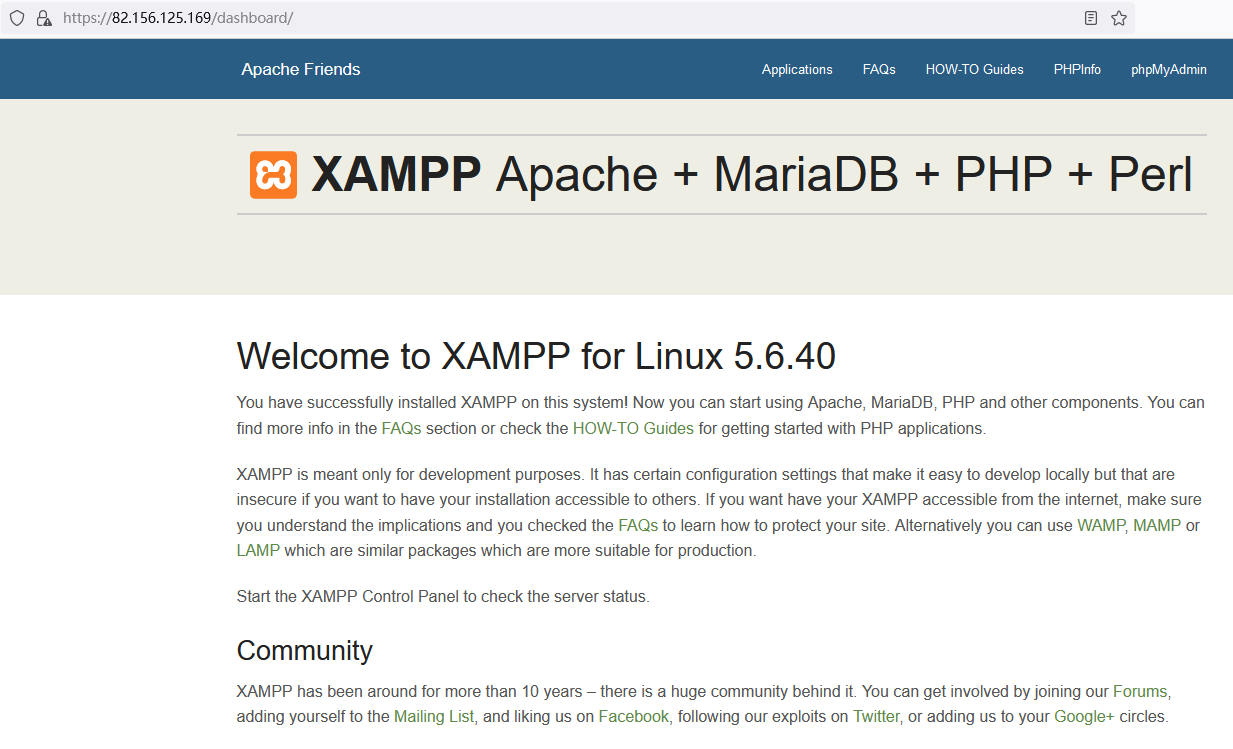
xampp

安装subversion

直接解压,移动到指定的位置即可

1
2
3
tar zxvf subversion-1.10.8-bin.tar.gz
mv subversion /usr/local/
cp /usr/local/subversion/*.so /opt/lampp/modules/

安装svnmanager

svnmanager 依赖 VersionControl_SVN-0.5.1,所以需要先安装这个组件:

1
2
cd /opt/lampp/bin
./pear install VersionControl_SVN-0.5.1

输出信息如下:

1
2
3
4
5
6
[root@VM-0-3-centos bin]# ./pear install VersionControl_SVN-0.5.1
WARNING: channel "pear.php.net" has updated its protocols, use "pear channel-update pear.php.net" to update
downloading VersionControl_SVN-0.5.1.tgz ...
Starting to download VersionControl_SVN-0.5.1.tgz (31,559 bytes)
.........done: 31,559 bytes
install ok: channel://pear.php.net/VersionControl_SVN-0.5.1

解压 svnmanager-1.10.tar.gz 移动到指定位置:

1
2
tar zxvf svnmanager-1.10.tar.gz
mv svnmanager-1.10 /opt/lampp/htdocs/svnmanager

创建svn仓库目录

新建svn必要的目录,并调整目录权限

1
2
3
4
mkdir -p /export/svnrepos/config
mkdir -p /export/svnrepos/repos
mkdir -p /export/svnrepos/trash
chown -R daemon:daemon /export/svnrepos/

修改配置文件

首先修改Apache的主配置文件:

1
2
cp /opt/lampp/etc/httpd.conf /opt/lampp/etc/httpd.conf.bak
vim /opt/lampp/etc/httpd.conf

搜索 LoadModule 在后面添加如下内容

1
2
3
4
5
6
7
8
9
10
11
12
13
14
15
16
17
18
19
# add for svn
LoadModule dav_svn_module modules/mod_dav_svn.so
LoadModule authz_svn_module modules/mod_authz_svn.so

<Location /svn>
DAV svn
SVNParentPath /export/svnrepos/repos
# Allow the index page to list all the repositories it contains
SVNListParentPath On
# Require SSL connection for password protection.
# SSLRequireSSL
AuthType Basic
# Message to give to the committer
AuthName "AW SVN"
# File listing users with write (commit) access
AuthzSVNAccessFile /export/svnrepos/config/svn_access_file
AuthUserFile /export/svnrepos/config/svn_passwd_file
Require valid-user
</Location>

修改svnmanger配置文件

1
2
cp /opt/lampp/htdocs/svnmanager/config.php.linux /opt/lampp/htdocs/svnmanager/config.php
vim /opt/lampp/htdocs/svnmanager/config.php

按照自己的本地目录修改成以下配置:

1
2
3
4
5
6
7
8
9
10
11
12
13
14
15
16
17
18
19
//Shell command's
$htpassword_cmd = "/opt/lampp/bin/htpasswd";
$svn_cmd = "/usr/local/subversion/bin/svn";
$svnadmin_cmd = "/usr/local/subversion/bin/svnadmin";

//Subversion locations
$svn_config_dir = "/export/svnrepos/config/";
$svn_repos_loc = "/export/svnrepos/repos/";
$svn_passwd_file = "/export/svnrepos/config/svn_passwd_file";
$svn_access_file = "/export/svnrepos/config/svn_access_file";

//If the following is set, removing a repository will cause it to be
//moved to this location rather than being deleted.
$svn_trash_loc = "/export/svnrepos/trash/";

//Data Source Name (only tested with mysql and sqlite!!)
//

$dsn = "mysqli://svnmanageruser:xxxpass@localhost/svnmanager";

基本上看注释和变量名都能明白各个配置的作用,简单解释几个:

  • $htpassword_cmd:用于加密svn用户密码的,svn支持明文密码,使用加密后密码更安全一些
  • $svn_passwd_file:保存SVN仓库所有用户的密码文件,svnmanager增删改用户时不仅修改自己的数据库,也会同步修改此文件
  • $svn_access_file:保存SVN仓库所有权限访问规则,svnmanager增删改用户和组的权限时不仅修改自己的数据库,也会同步修改此文件
  • $dsn:svnmanager自己访问MySQL的用户名、密码、及数据库名字

为svnmanager创建MySQL用户

直接在命令行用mysql命令就可以登录MySQL,无需密码,这也是前面提到的XAMPP不安全的地方,好在设置的是只允许本地访问

1
2
cd /opt/lammp/bin
./mysql

展示如下:

1
2
3
4
5
6
7
8
9
10
[root@VM-0-3-centos bin]# ./mysql
Welcome to the MariaDB monitor. Commands end with ; or \g.
Your MariaDB connection id is 13
Server version: 10.1.38-MariaDB Source distribution

Copyright (c) 2000, 2018, Oracle, MariaDB Corporation Ab and others.

Type 'help;' or '\h' for help. Type '\c' to clear the current input statement.

MariaDB [(none)]>

为svnmanager创建MySQL用户,并授予权限:

1
2
3
4
CREATE DATABASE svnmanager;
CREATE USER 'svnmanageruser'@'localhost' IDENTIFIED BY 'xxxpass';
GRANT ALL PRIVILEGES ON db . * TO 'svnmanageruser'@'localhost';
FLUSH PRIVILEGES;

执行结果如下:

1
2
3
4
5
6
7
8
9
10
11
12
13
14
15
16
17
18
19
20
21
22
23
24
25
26
27
28
29
30
31
MariaDB [(none)]> CREATE DATABASE svnmanager;
Query OK, 1 row affected (0.00 sec)

MariaDB [(none)]> CREATE USER 'svnmanageruser'@'localhost' IDENTIFIED BY 'xxxpass';
Query OK, 0 rows affected (0.04 sec)

MariaDB [(none)]> GRANT ALL PRIVILEGES ON svnmanager . * TO 'svnmanageruser'@'localhost';
Query OK, 0 rows affected (0.00 sec)

MariaDB [(none)]> FLUSH PRIVILEGES;
Query OK, 0 rows affected (0.00 sec)

MariaDB [(none)]> show databases;
+--------------------+
| Database |
+--------------------+
| information_schema |
| mysql |
| performance_schema |
| phpmyadmin |
| svnmanager |
| test |
+--------------------+
6 rows in set (0.01 sec)

MariaDB [(none)]> use svnmanager
Database changed
MariaDB [svnmanager]> show tables;
Empty set (0.00 sec)

MariaDB [svnmanager]>

重启xammp服务

1
/opt/lampp/xammp restart

展示如下:

1
2
3
4
5
6
7
8
[root@VM-0-3-centos ~]# /opt/lampp/xampp restart
Restarting XAMPP for Linux 5.6.40-1...
XAMPP: Stopping Apache...ok.
XAMPP: Stopping MySQL...ok.
XAMPP: Stopping ProFTPD...ok.
XAMPP: Starting Apache...ok.
XAMPP: Starting MySQL...ok.
XAMPP: Starting ProFTPD...ok.

访问svnmanager

在浏览器输入IP地址/svnmanager/ 访问如下:
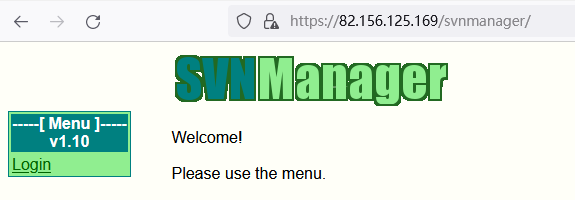
svnmanager

登录svnmanager

svnmanager安装后默认使用admin用户登录,密码也是admin,这个可以在 /opt/lampp/htdocs/svnmanager/config.php 文件中配置,当我们添加新用户后,admin这个自动废弃。

添加新用户的步骤:『admin登录』-> 『User Admin』 -> 『Add a new user to the repository system』 -> 『输入新用户信息和自己的密码』 -> 『Confirm』

添加完新用户就可以使用新用户登录了,还可以创建新的仓库并给用户授予权限

创建新仓库的步骤:『Repository Admin』 -> 『Create a new Repository』 -> 『输入新库名和描述』 -> 『Confirm』

给用户授予访问仓库的读写权限步骤:『Repository Admin』 -> 『Change User Privileges of a Repository』 -> 『Repository Name select』 -> 『选择用户、路径,勾选读写权限』 -> 『Confirm』

此外还有一些svnmanager操作可以查询官方文档,一般会把所有用户分成组管理,并把各个库的权限授予不同的组,这个实践一下就清楚了。

可能遇到的错误

如果你遇到了以下错误,一定是配置访问MySQL服务的用户或权限不匹配了,检查纠正过来就好

1
2
3
4
5
6
7
8
9
10
11
12
13
14
15
16
17
Fatal Error

[2] mysqli_real_connect(): (HY000/1044): Access denied for user 'svnmanageruser'@'localhost' to database 'svnmanager' (@line 86 in file /opt/lampp/htdocs/svnmanager/prado-2.0.3/framework/Data/adodb/drivers/adodb-mysqli.inc.php).
Debug Backtrace

#1 -- pradoErrorHandler(...)
#2 adodb-mysqli.inc.php:86 -- mysqli_real_connect(...)
#3 adodb.inc.php:416 -- ADODB_mysqli->_connect(...)
#4 adodb.inc.php:3713 -- ADOConnection->Connect(...)
#5 TAdodb.php:318 -- ADONewConnection(...)
#6 TAdodb.php:113 -- TAdodb->open()
#7 DataModule.php:31 -- TAdodb->__call(...)
#8 DataModule.php:31 -- TAdodb->MetaTables()
#9 TApplication.php:584 -- DataModule->onLoad(...)
#10 TApplication.php:629 -- TApplication->loadModule(...)
#11 TApplication.php:482 -- TApplication->loadPage(...)
#12 index.php:5 -- TApplication->run()

查看服务器目录信息

查看一下服务器目录下信息,之前我们建立了三个空文件夹 configrepostrash,现在已经有很多数据了

1
2
3
4
5
6
7
8
9
10
11
12
13
14
15
16
17
18
19
20
21
22
23
24
25
26
27
28
29
30
31
32
33
34
35
36
37
38
39
40
41
42
43
44
45
46
47
48
49
50
51
52
53
54
55
56
57
58
59
60
61
62
63
[root@VM-0-3-centos export]# tree svnrepos
svnrepos
|-- config
| |-- auth
| | |-- svn.simple
| | |-- svn.ssl.client-passphrase
| | |-- svn.ssl.server
| | `-- svn.username
| |-- config
| |-- README.txt
| |-- servers
| |-- svn_access_file
| `-- svn_passwd_file
|-- repos
| `-- firstrepos
| |-- conf
| | |-- authz
| | |-- hooks-env.tmpl
| | |-- passwd
| | `-- svnserve.conf
| |-- db
| | |-- current
| | |-- format
| | |-- fsfs.conf
| | |-- fs-type
| | |-- min-unpacked-rev
| | |-- revprops
| | |-- revs
| | |-- transactions
| | |-- txn-current
| | |-- txn-current-lock
| | |-- txn-protorevs
| | |-- uuid
| | `-- write-lock
| |-- format
| |-- hooks
| | |-- post-commit.tmpl
| | |-- post-lock.tmpl
| | |-- post-revprop-change.tmpl
| | |-- post-unlock.tmpl
| | |-- pre-commit.tmpl
| | |-- pre-lock.tmpl
| | |-- pre-revprop-change.tmpl
| | |-- pre-unlock.tmpl
| | `-- start-commit.tmpl
| |-- locks
| | |-- db.lock
| | `-- db-logs.lock
| `-- README.txt
`-- trash
|-- testrepos1-2022-09-17T10:51:04+02:00
| |-- conf
| | |-- authz
| | |-- hooks-env.tmpl
| | |-- passwd
| | `-- svnserve.conf
| |-- db
| | |-- current
| | |-- format
| | |-- fsfs.conf
| | |-- fs-type
...
...

config 目录下增加了管理权限的文件 svn_access_file 和用户密码的文件 svn_passwd_file,repos目录下新增了刚刚新增加的库 firstrepos,trash 目录下是我刚刚删除的无用的仓库。

检出新增加的svn库

使用subversion客户端填写 https://IP/svn/firstrepos 地址可以下载我们最新的库 firstrepos,需要输入刚刚授予了权限的用户和密码。

注意事项

各个组件的配置文件

The main XAMPP configuration files are located as follows:
Apache configuration file: \xampp\apache\conf\httpd.conf, \xampp\apache\conf\extra\httpd-xampp.conf
PHP configuration file: \xampp\php\php.ini
MySQL configuration file: \xampp\mysql\bin\my.ini
FileZilla Server configuration file: \xampp\FileZillaFTP\FileZilla Server.xml
Apache Tomcat configuration file: \xampp\tomcat\conf\server.xml
Apache Tomcat configuration file: \xampp\sendmail\sendmail.ini
Mercury Mail configuration file: \xampp\MercuryMail\MERCURY.INI

配置svn服务过程可能修改的文件

1
2
3
/opt/lampp/etc/httpd.conf
/opt/lampp/htdocs/svnmanager/config.php
/opt/lampp/etc/extra/httpd-ssl.conf

这配置文件 /opt/lampp/etc/httpd.conf 中还可以通过 LimitRequestBodyLimitXMLRequestBody 等参数限制访问和提交的数据量

配置服务器时间

如果发现svn提交记录时间不匹配,一般是因为svn服务器时间错误导致的,可以使用 date 命令修改,也可以配置一个 ntp 服务器来解决

ntp update -s xxx.xxx.xxx.xx 指定ntp服务的IP或域名,默认使用UDP 123端口
ntpq -pntpstat 可以查看ntp同步状态

备份svn库

在迁移之前我们讨论了很多种方案,其中也包括一些备份方式,其实最简单的备份就是拷贝,所以我们可以使用 rsync 命令通过网络备份,把 svn 库的主目录 svnrepos/opt/lampp 同步到备份机器,如果svn服务器出现了问题,可以立即用备份机提供服务。

主动生成密码文件

/opt/lampp/bin/htpasswd -c /export/svnrepos/config/svn_passwd_file test 命令可以创建svn_passwd_file文件,并添加第一个用户test,执行命令后会提示输入两次新密码,切记不要在已经存在用户的svn仓库中使用,否则会被覆盖

其他问题

如果搭建好的svnmanager可以创建用户和仓库,但是无法授予权限,网页错误中包含 libserf,可以通过 yum install libserf 命令解决。

如果添加好用户授予权限后,无法通过svn客户端更新,可以用检查 /export/svnrepos/config/svn_passwd_file/export/svnrepos/config/svn_access_file 文件归属是否正确为 daemon,如果为文件归属 rootsvnmanager 无法修改文件内容,也就会导致用户权限分配不正确

如果想限制访问svn的IP,可以启用 firewalld 服务或者安装使用 iptables 服务

总结

  • XMAPP 可以方便的提供WEB服务,可以把网站放到 /opt/lampp/htdocs 目录下
  • 可以利用 XAMPP + subversion + svnmanager 的组合提供SVN服务,方便的创建仓库和管理各目录权限
  • CentOS 安装具体的环境前,可以安装一些通用的软件,yum install -y epel-release
  • EPEL全称Extra Packages for Enterprise Linux,由 Fedora 社区打造,为 RHEL 及衍生发行版 CentOS 等提供高质量软件包的项目
  • systemctl 是一个常用的服务命令,比如关闭 firewalld 服务 systemctl stop firewalld,查询状态 systemctl status iptables

==>> 反爬链接,请勿点击,原地爆炸,概不负责!<<==

岁月没有在某些人的脸上留下痕迹,但却对我特别照顾,好像在我这里过的特别匆忙,认真想想自己确实对保留青春阳光付出甚少,甚至连洗脸的时间都一再压缩,也难怪它还给我这些沧桑,今后多花点时间注意一些吧,你认真的注视着它,它便不会轻易溜走~

2022-9-17 20:47:42

Albert Shi wechat
欢迎您扫一扫上面的微信公众号,订阅我的博客